Showing posts with label Entertaining. Show all posts

Tuesday, May 15, 2012

Peach Citrus Sangria


At my sister's baby shower, we served Peach Citrus Sangria, and it was delicious.  My mom and I wanted to offer a refreshing cocktail that was easy to make, festive, and light enough for a midday party (so, that ruled out anything with tequila or vodka).  We took Eddie Ross's Fresca-based Sangria recipe (that I made for Brooke's Baby Shower) and tweaked it a bit.  We gave it a peach flavor and made it pink!  The drink was such a huge hit that we actually ran out towards the end of the party.  I swear.  These ladies went through two huge batches, it was that yummy.


So, here's the recipe:


You can play with the proportions a bit, if you would like.  And you can also replace the original Fresca with Peach Fresca (although, we decided against it since Peach Fresca doesn't come in 2 liter bottles).  But, any way you mix it, this drink is really wonderful and perfect for sipping on the patio this summer.  Enjoy!

...

Thursday, May 10, 2012

My Sister's Baby Shower


My sister is having a baby(!!!), so we all came together this past weekend to celebrate with a Baby Shower in Bonita Springs, Florida.  My mom and I co-hosted the big event and flew into town late last week to start the party preparations.  We had been planning the big day for months, so we arrived in Florida with checklists in hand and boxes full of party supplies. :)

My younger sister Alyssa is very cool and unfussy, so we wanted the party to feel the same way.  Taking a cue from Lilly Pulitzer and "1960s Florida" we kept the palette fresh with lots of citrus hues and classic gingham prints.  Even though she's having a baby boy, we wanted the party to feel grown-up and gender neutral-- because after all, it's also a celebration of new motherhood!  So, we were allowing ourselves to feel a little girly too.  :)  We reserved the stunning screened-in pavilion at Estero Bay Park (a hidden gem in the beautiful community of Bonita Bay) and it was the perfect party venue.  I snapped a few pictures before the guests arrived and thought I would share them here...  Enjoy!


We used vintage Ball Jars to hold fresh hydrangeas on all the tables (the blue glass sparkled in the sunlight!).  We served refreshing peach sangria, fresh lemonade, tiny bottles of San Pellegrino and Diet Coke.  Guests helped themselves to appetizers that included baby vegetables, tiny watermelon slices, and bite-sized tea sandwiches.  We made all of the food from scratch, and for lunch we served strawberry salad, chicken salad (my sister's favorite recipe) and homemade quiche.  The quiche recipe ROCKED and many people asked for the recipe.  It's from Paula Deen and you can find it HERE.   For dessert, we made homemade red velvet cupcakes with cream cheese frosting and shaved coconut (again, Alyssa's favorite).  And, we served raspberry shortbread cookies alongside carrot cake!

I custom designed all of the menus, invitations, and labels (I love doing that kind of stuff).  To decorate, we used baby blue gingham fabric for table runners, silver plated serving accessories (to dress it up a bit) and vintage milk glass.  The modern white frames are from Ikea, and they held all the table menus (only 99 cents each!).  The brown gift bags and baby blue swirly straws are from Hey Yo Yo.  And, the "Baby Michael" cocktail napkins were custom designed by us at ForYourParty.com.   All of the rentals were from Taylor Party Rentals.  All photographs were taken by me, which explains for the grainy quality of some.  Sorry about that.  :)

...

I hope you enjoyed seeing some of the pictures from my sister's baby shower!  It was a very special day for my family, and one that we will never forget.   We are so blessed to welcome this precious gift into our family (baby Michael, named after my dad!).  My sister Alyssa and her husband Chris are going to be phenomenal parents.  :)

...

Thursday, January 5, 2012

The Bar Cart


A great bar cart can make a party happen in any room.  Am I right, or am I right?


If the bar cart is on wheels, well, you can take it from the dining room to the living room (and back again!).  We're partial to our "Alfred" Bar Cart-- with it's polished nickel frame and mirrored countertops...


But, I also loooove this brass version from Williams Sonoma.  Leather handles, people!


Over the Holidays, a vintage bar cart from our store made it home with a High Street Market customer (a very talented photographer in New York).  She even snapped a picture of it all decked out, in it's new home! 


 Looks pretty spiffy, if I do say so myself.


...

Thursday, September 8, 2011

Table Setting


So inspired by this simple table setting.  Isn't it lovely?


I love a good skinny stripe, especially.


...


Friday, July 1, 2011

Have A Sweet Weekend!


4th of July "fireworks cookies", from Martha Stewart (of course).
Even though these cookies look intimidating, the decorating process actually sounds quite easy.  I might try it.


find the recipe HERE!


...

Tuesday, June 21, 2011

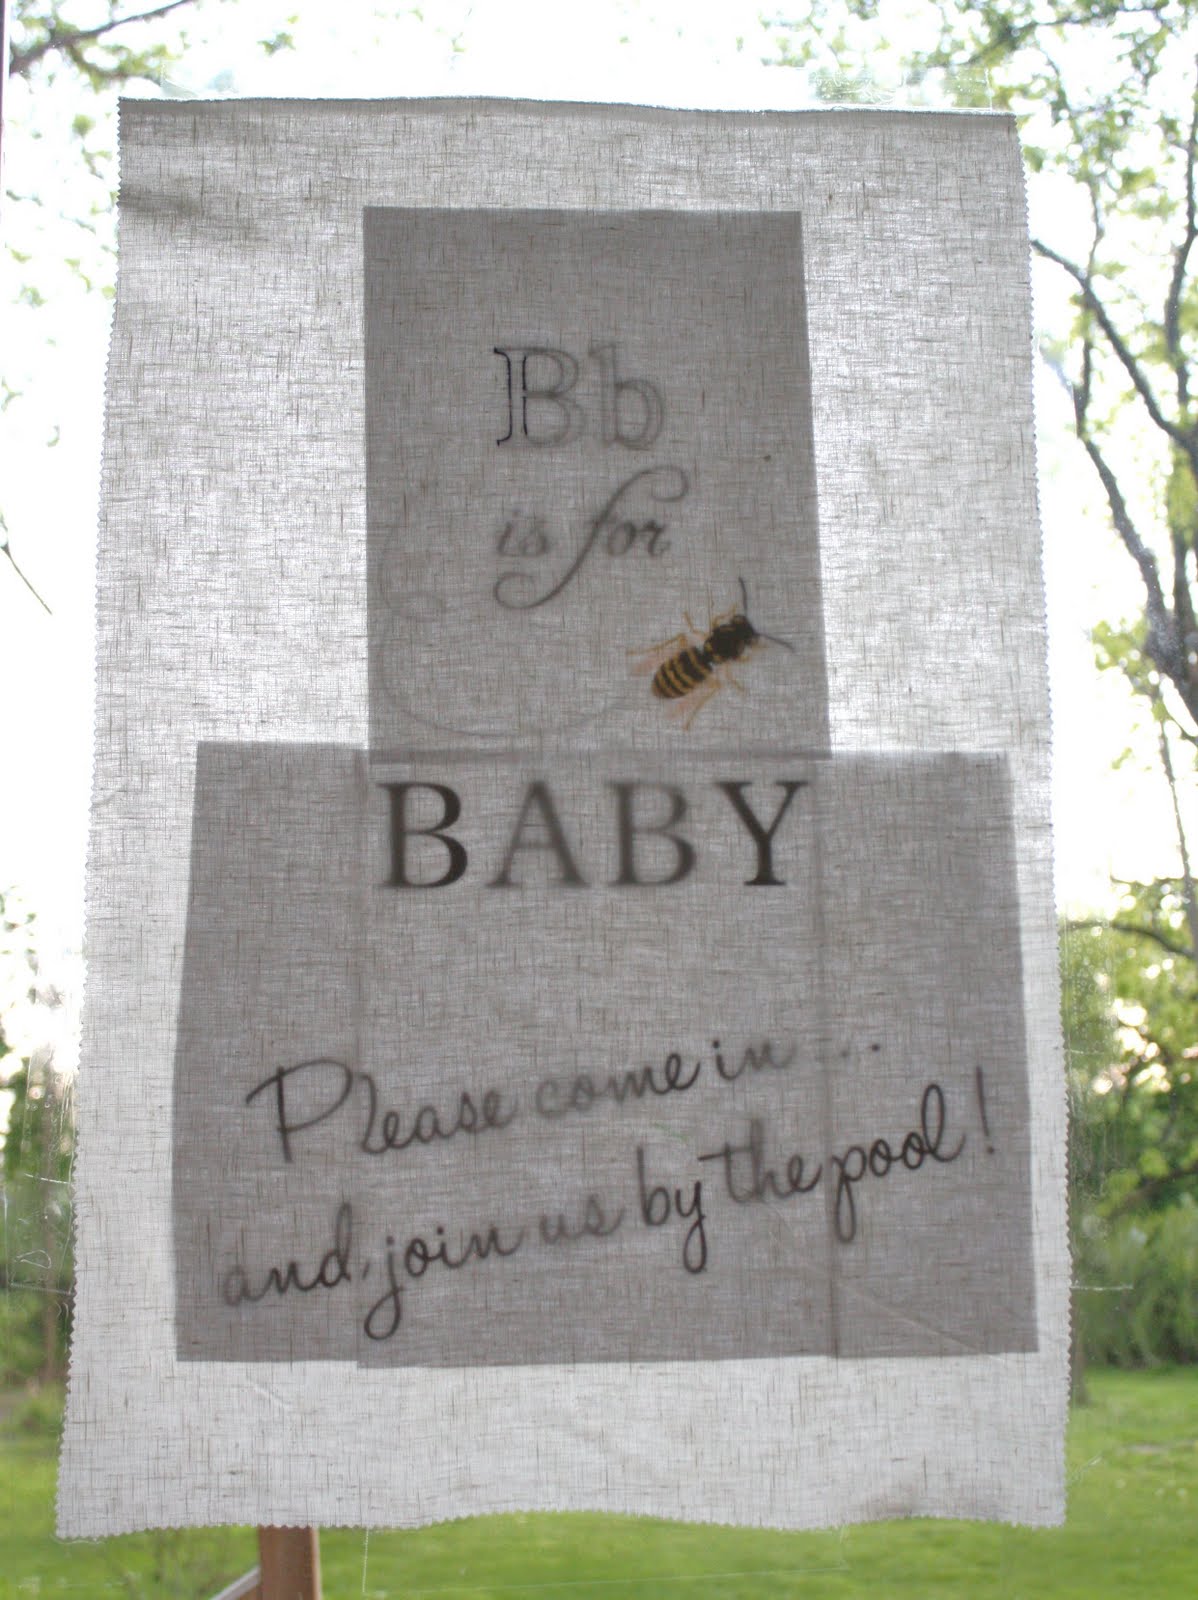
DIY: Custom Linen Door Banner


Of all the handmade projects I did for my friend's baby shower, this one was one of my favorites.  It's SO easy, everyone can do it.  To make this door banner, you'll need a fragment of linen, a pack of Sharpies, and a wooden dowel.


I started with a design that I made on the computer.  I used Adobe Illustrator, but you could use any program (including the basic, boring Microsoft Word).


Since I can't print out a sheet of paper measuring 26 x 18 inches on my tiny home printer, I printed my design in "tiles".  Then, I taped each sheet of paper to the window:


Next, cut a piece of linen to size (mine was 18 x 26 inches).  I used a fragment of ivory linen that I had laying around my office, but any simple fabric remnant will do. 


Layer the cut linen over your design and TRACE.  Yes, trace.  It's as simple as that!!!


I used these Sharpie markers.  Ultra-fine point is the best and will give you the most control on those fine fonts... also, I was thrilled to see how the pigment was absorbed by the linen.  The black was nice and dark, and the yellow was well saturated.  I had initially thought about painting the banner, but using Sharpies was about one thousand times easier.  And, much cleaner.


(picture taken after I had finished tracing the design, and before I had given this thing a good iron)


Next, you'll need to attach your banner to a hanging dowel.  I purchased mine at this fine establishment:


where, clearly, everything's $1.00


including this plastic flag, which was attached to lovely wooden hanging dowel:


I kindly removed the flag, and using fabric glue (I like Fabri-Tac), glued the top edge of the banner to the dowel.  Then, I rolled the fabric over the glue line for about 1 inch (to hide the messy glue and create a clean look).


You're done!


It doesn't get any easier.

Wouldn't this be a fun little project for birthday parties?


...

*first image and last two images, courtesy of Amanda Bevington Modern Photography*


Related Posts Plugin for WordPress, Blogger...